This is not part of the actual workshop but rather to give a little insight as to the extent we'll actually be going.
This first series of "teaser-pics" is to give an idea of how poorly the gasket-matching is between the upper/ower portions of the intake halves. And how with gasket-matching these can and will be made to become a perfectly mated pair.
This is purely-gasket-matching. When done we will have gasket-matched 30 intake/outlet ports to each other and their gasket. We'll also be gasket-matching the throttle body.
This manifold has not been cleaned other than run thru the dishwasher once. But it doesn't need to be spotless for this facet.
In many of these pics you can also see some of the roughness left from the sand-casting in the intake runners. Those will be cleaned up later when we get into this.
VERY IMPORTANT: DO NOT REMOVE YOUR SWITCHOVER MECHANISM AS I HAVE ON THIS MANIFOLD. THAT PROCESS WILL BE COVERED LATER AND IS NOT FOR ALL PARTICIPANTS, IT'S A HUGE PROJECT TO DO AND NOT EVERYONE WILL BE COMFORTABLE OR WELL-TOOLED ENOUGH TO ATTEMPT IT.
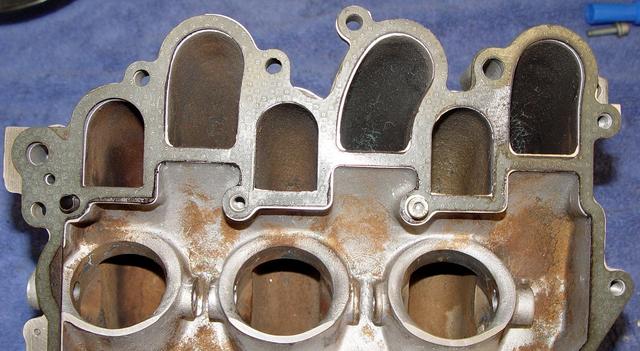
First pic shows the un-matched gaskets and ports with the gasket thats been on this manifold for at least 9 years. As you can see the stock system leaves a LOT to be desired for smooth flow.
Be sure to see/compare this pic with the finished pic #4 in this series.
Prussian bluing the ports
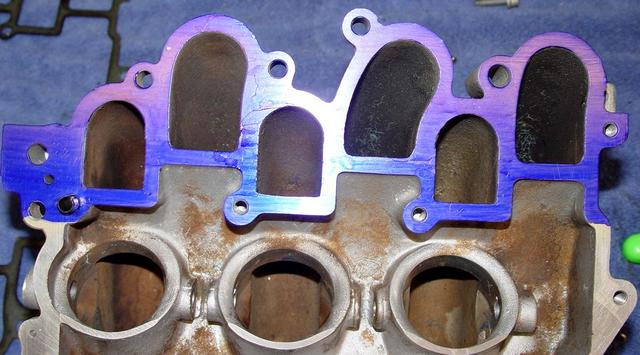
This is a process used for gasket matching which involves the use of Prussian Blue marking dye. You could also use Dykem Red or even a broad-tipped magic marker if on a shoestring budget.
This will now have the gasket placed back on then with a sharp awl I will scribe a line just inside the gasket on the runner flange.
Scribed ports
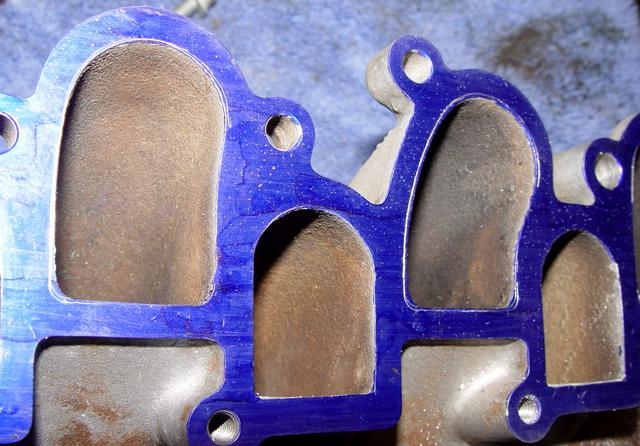
This pic shows the ports once the gasket was replaced then scribed around the inside of the gasket ports leaving a fine line that will be ground with a flex-shaft grinder and a carbide burr up to the outside of the score line.
Note: Scoring is not deep enought to scratch the metal. It's only purpose is to remove the Prussian Blue so that a bright silver line becomes the line to stay within, ie; "coloring inside th lines."
This process may have to be repeated tens or even dozens of times to re-scribe by replaing the gasket and re-scribing.
DO NOT GASKET-MATCH USING THE GASKET AS YOUR PATTERN FOR GRINDING!!
If you do that you risk cutting the gasket to a shape or relief that doesn't exist on the mating piece of the manifold. Essentially un-gasket matching on the opposite side of th manifold.
YOU MUST DO IT THE HARD WAY... WITH SCRIBE MARKS!!
Perfectly matched
gaskets/ports
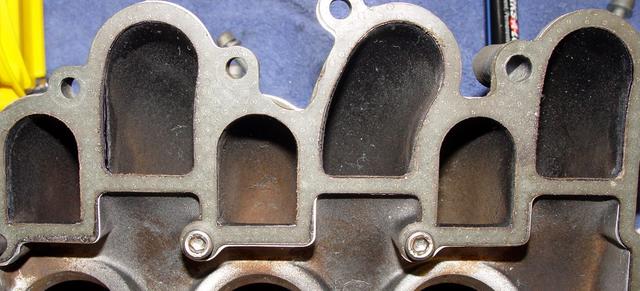
In this pic we can now see the ports matched perfectly to the gasket. The same process will now be repeated on the other side of the top half. Now the intake manifold has perfectly matched and mated ports. Then the left/right sides of the bottom half. Then the left/right side of the intake-to-head manifold outlets as well as cylinder head inlets which will be done on the car just before installing completed intake manifold nearer April.
Gasket-matching total time for 6 ports: 7.15 hours. 24 remaining.