High-flow Airbox workshop starts...
I'll do the workshop but it's up to you guys to archive the info and pics.
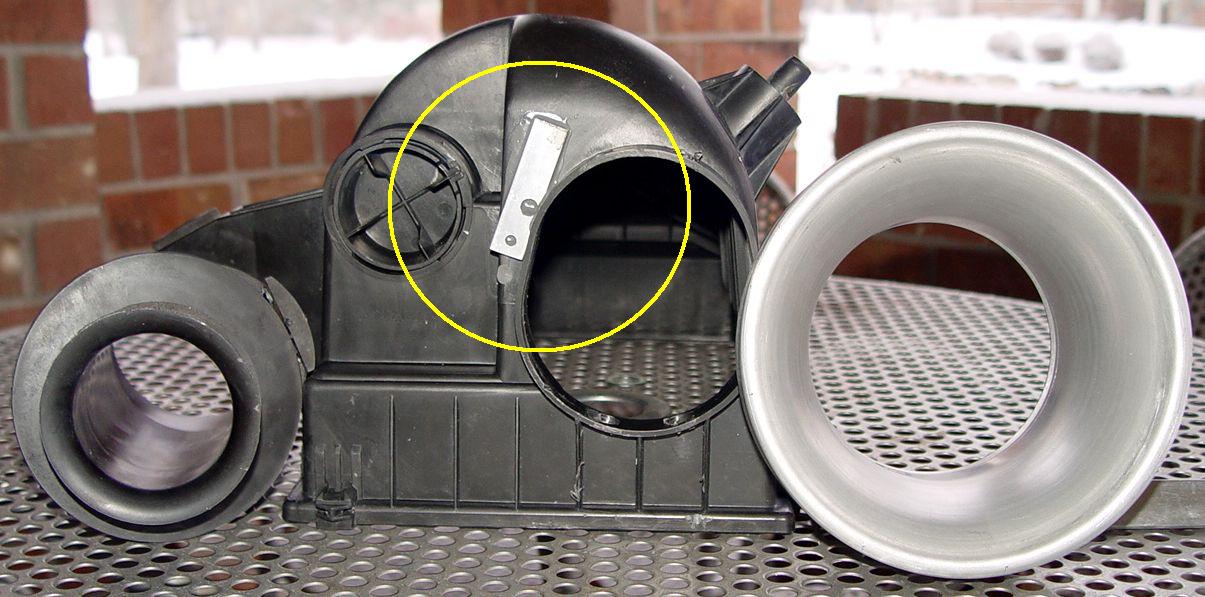
OEM stock diameter air horn inlet that came from this airbox is on the left in pic while the velocity stack that will replace it is on the right
I'll be doing 5 B4 airboxes total so at times I'll be doing different things on or to different airboxes. Most or much of this information can be used for other airboxes. Yellow line represents approx size/location where a 4" diameter hole will be cut with a hole saw. The open and plugged areas just outside of that circumference will be patched and molded closed/sealed or a CNC'd aluminum decorate bezel plate will be adhered and sealed permanently to the entire airbox side shown in this picture that is the same profile as the airbox front. Time will tell on this particular aspect.
First pic shows the airbox with a 1/8" thick aluminum "strap" with a 1/4" hole that's "JB Welded" at the location that will be the center of the 4" diameter inlet. The plastic is too thin to use a hole saw if nothing reinforces the pilot drill. By drilling a thin strip of aluminum with a 1/4" pilot drill then using that for the pilot drill center-point in the hole saw everything will cut nicely save for a small stretch that is too deep for the hole saw and will be finished by jig saw. Everything within the yellow circle falls out once cut and is thrown away anyway. Just clean and "rough-up" the airbox where you'll be epoxying this pilot dril reinforcement. Wood could just as easily be used but I'm not a woodworker so I use what I have around.
In this pic you can see the OEM airbox inlet diameter on left and the new VS inlet diameter that will be used for this airbox on the right. While this VS is big it's pretty crudely made. Has great taper profiling but a very undulated surface from it's leading outer edge to it's inner outlet. If I can clean it up I'll use it. If not than I'll make a new swedging die and make my own but that will put this project off 6-8 weeks as there's a TON of work and expense involved in making a die this size and it will easily weigh in at 30+lbs when finished.
I'll supplement this post with a follow-up pic after cutting the hole with the VS slipped into the airbox bore opening.
There will be a lot of "patch work" fillers, putty etc required on the leading edge of this airbox after cutting. I may opt to CNC an 1/8" aluminum bezel plate to cover the entire lower box profile if that starts to get too "patched-up" or "clunky-looking." And due to this I'm now considering putting off the "Rhino-Liner" type insulating until I get further along or risk having to go back, do it over later.
Pic 2...
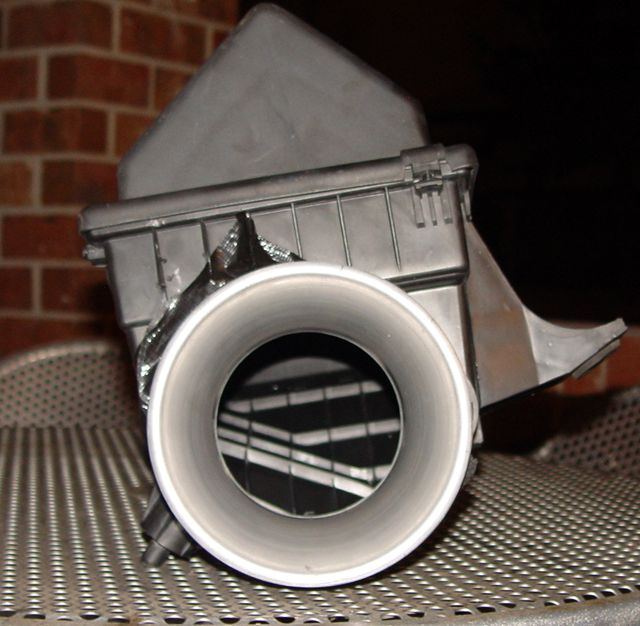
VS is just held in place with a few pieces of black duct tape so it's not oriented/aligned where it will live permanently. But gives you an idea what it'll look like.
I am SLAMMED with suspension work as the race season starts this month for Rally-X and next month for road race so it may be a week or two before I can get back to this.