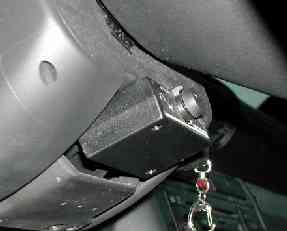
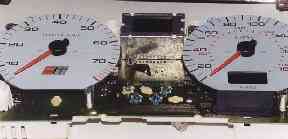
Anyway, I pulled the IC apart to see how much room was behind the panel
There is just enough room to do this, everything is tight but it
almost seems too good to be true.
|
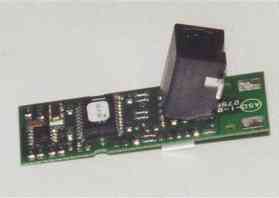
The remote display has to be completely butchered. From memory
I believe the side with the power connector is the same side as the mute
button.
|
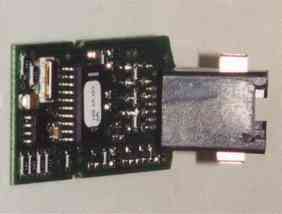
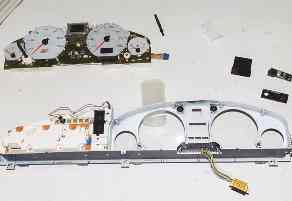
This is important because the board is too large for the trip
computer location. The power connector (RJ11) has to be bent up 90 degrees
and the mute button cut off. Then it will fit perfectly. I used hot melt
glue to hold the power connector at a 90 degree to the board.
|
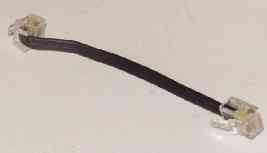
The power wire that I used was about a 4" piece; the kind you would use for
a hanging wall phone. I used this so I could have a connecter behind the IC
when removing it in the future.
|
There is a longer piece with a coupler on
the end which runs to the power connector. This short piece had to be
modified as well, because there is just enough room for the connector on the
remote display to fit behind the IC face.
|
Basically you need
the wire to stick out of the side of the connector at a 90 degree angle.
|
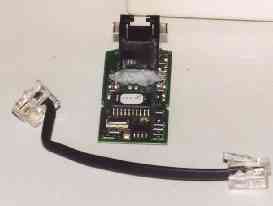
I made a sharp bend where the wire will fit through a hole in the IC Board,
and finally out the back of the IC.
|
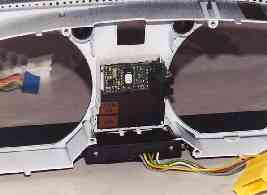
When the V1 remote circuit board is in place, you can see how the 4" phone
connector wire stands away from the front of the IC. It will protrude
through the back of the IC when it is assembled.
|
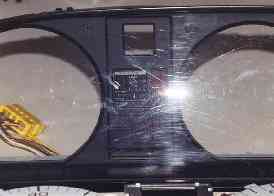
The remote display face also has to be cut. Now I believe there was a small
decision to be made here. Without modifying the IC face plate, the hole for
the trip computer is just too small to see the entire V1 remote display. I
decide to cover up a bit of the arrows since I wouldn't loose any important
info, you can still see them very well.
|
So I cut the remote display right
about where the hole for the mute button was, but you should measure it with
the IC trip computer location. Don't worry about a perfect cut; the edges
will be covered by the IC face plate. I used hot meld glue to hold the
remote display face to the IC face panel
|

The other modification was the false trip computer cover. I decided to just
cut mine to the proper size and deal with it later if I was going to remove
the V1. I'm not sure how you would get around cutting this.
MAKE SURE YOU TEST THE DISPLAY before putting the IC back in the car. The
first time I did this mod some of the lights weren't working. I don't
remember to well, but I think I had to check the connections to the power
connector. The fact that I cannot remember leads me to believe that the
problem wasn't major.
|
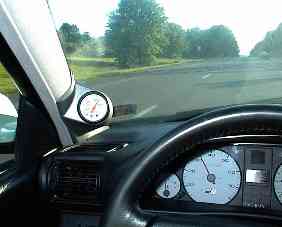
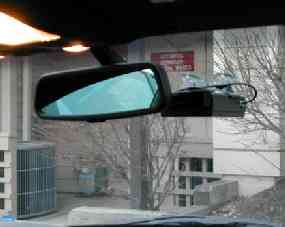
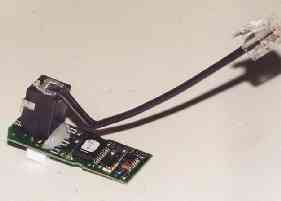
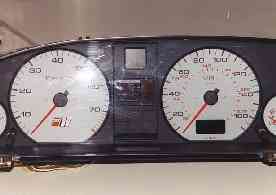
A view of the finished result.
|