|
Audi UrS4/S6 Samco Intake Hose Install
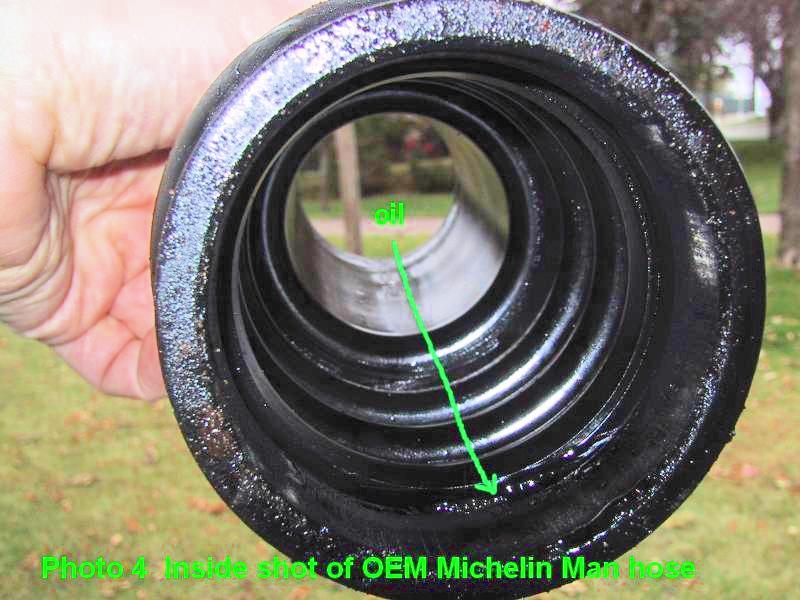
The Audi OEM intake tract hoses that carry pressurized air from the
turbo to the throttle body have been known to fail under the higher
boost pressures from a chipped ECU. Heck, they've been known to fail
with a stock ECU after they've marinated in oil for 6 years or so.
Samco makes a set of silicone intake hoses that can take higher boost
pressure than the OEM hoses and are more resistant to oil. I've just
installed a set of the Samco hoses from the James Murray
group purchase
(thanks James!) and put together the following "how-to" on the job.
Samco (or reasonable facsimile thereof) Install How-to.

5. Lube the inside of the Samco hose and the hose stubs with water, slip the loose clamps over the hose, and install the hose. I installed it on the intercooler first, then on the throttle body, and finally on the ISV. It took a few minutes to get it on the intercooler stub, but the rest went easily. (see Photo 2). 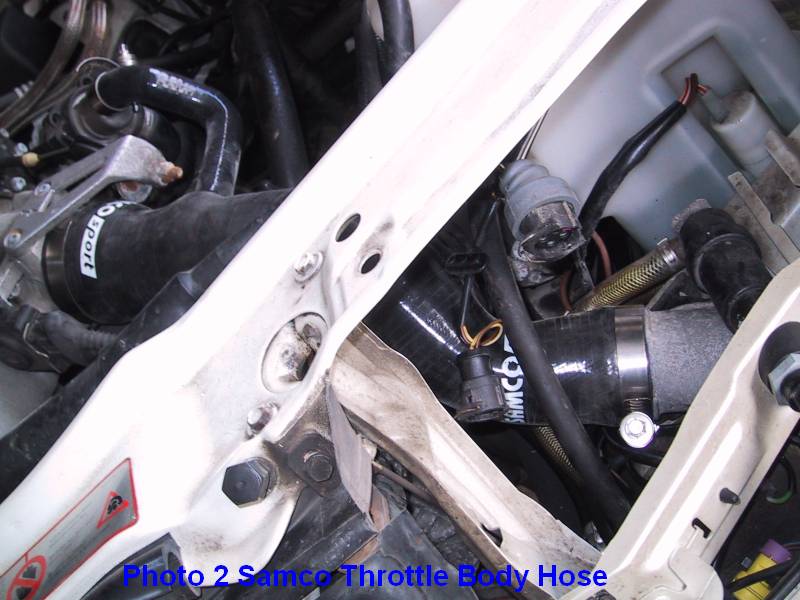
6. A note on clamps: The Samco hoses are stiffer and stronger than the OEM clamps. The OEM clamps just won't cut it, cheapskate, so go out and buy yourself some hefty T-bolt or constant-torque clamps. I opted for the CT clamps that are visible in some of the photos. Here's some sources for clamps and small color matched hoses: T-Bolt Clamps , Constant Torque Clamps , More Clamps and small colored hoses 7. On to the famous Michelin Man hose (see Photo 3), the one that most commonly fails. 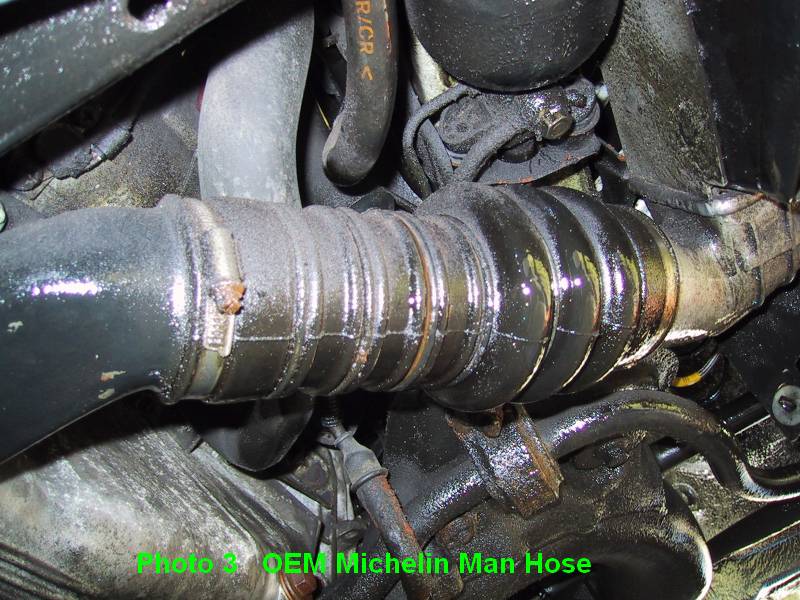
8. Lube the inside of the Samco hose with water, slip the loose clamps over the hose, and install (see Photo 5). If you have trouble, you can remove the hanger bolt on the X-pipe and drop the end - I didn't have to do this. Now that's a hose! None of that mushy OEM stuff, no sir! And that's a clamp, son, you can get some serious torque on those babies! 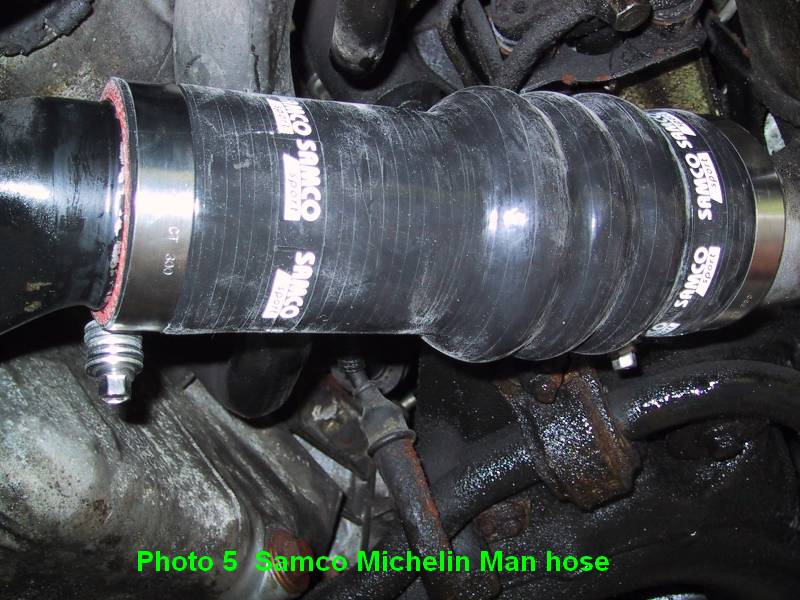
9. Now for the turbo to X-pipe hose (see Photo 6). Access to this area is very limited. To improve it, remove the turbo intake hose (see Photo 7). This also gives you the chance to check the turbo impeller to see if it's rattling around in there. Loosen the clamps on the old hose and remove the X-pipe hanger bolt at the turbo end of the pipe (see Photo 6). Drop the end of the X-pipe and remove the hose. 
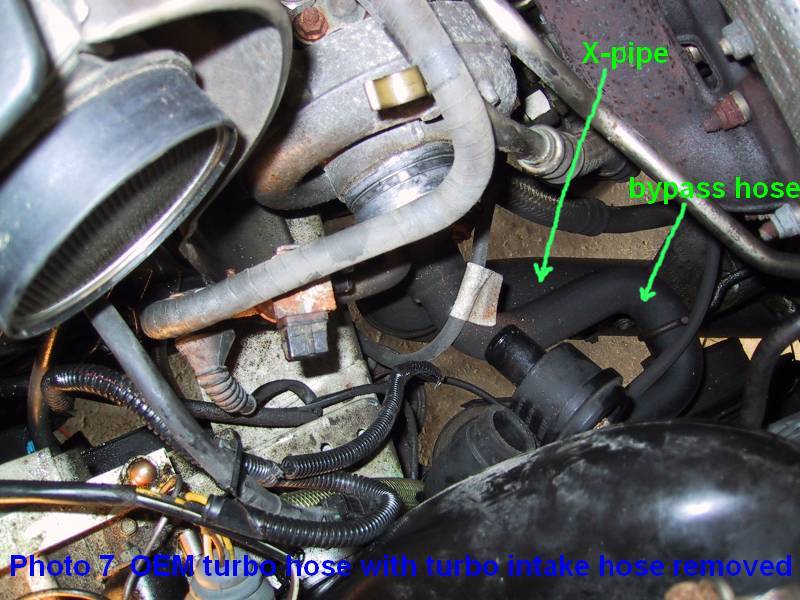
10. Cover the open end of the X-pipe - this is downstream of the air filter and the engine will eat any chunks you drop in here. 11. The Samco turbo hose comes in two pieces - the hose to the bypass valve is separate from the main hose (see Photo 8). I used a straight 3/4" copper pipe connector & a couple of clamps to join them. Make sure you put it together so it matches the old hose :o) 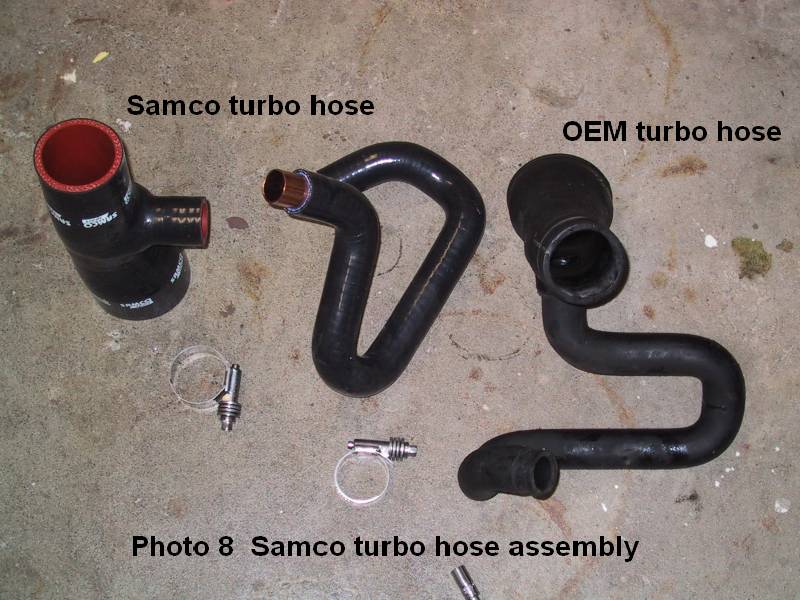
BR> 12. Install the Samco hose using water as lube if required (I didn't lube this one). Note the routing of the engine ground strap - it passes in front of the hose and above the bypass hose. Re-install the X-pipe hanger bolt. (see Photo 9). 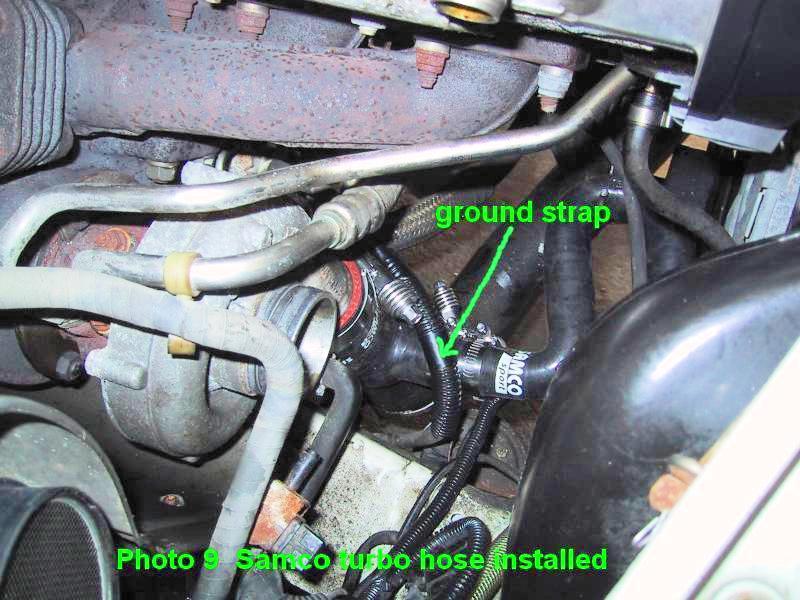
13. In the immortal words of the Bentley, put it all back together in reverse order of removal. Simple, what? Fred Munro '94 S4
|