Instrument Cluster Lamp Replacement
-Submitted by: Bob McComiskie (2005-04-27)
This is my story of replacing the instrument panel lamps in my Audi 1996 Audi A6 Quattro Avant. The whole job took me about 2 hours. Of course, that disregards the 3 weeks of Web research to find the right procedure and locate the parts.
Tools Required:
-Soldering iron
-Solder
-Desoldering pump or solder wick
-Small Phillips-head screwdriver
-Common sense
Parts Required:
-2-pin miniature incandescent lamp (Radio Shack PN 272-1092, 12V, 60mA); 1 lamp for the Temperature display and 2 lamps for the Shift display
-12V, 60mA, 1.2W instrument lamps (NAPA Auto Parts, PN 17035, Generic PN 2721MF) (Comes in a 10 pack for about $20). Need 16 of these lamps to replace everything. The same lamp will replace all of the instrument lamps no matter the base type.
Procedure:
1. Buy the lamps: the temperature display lamp is Radio Shack PN 272-1092. The instrument lamps are NAPA PN 17035 (ask for a 2721MF lamp and they can look it up).
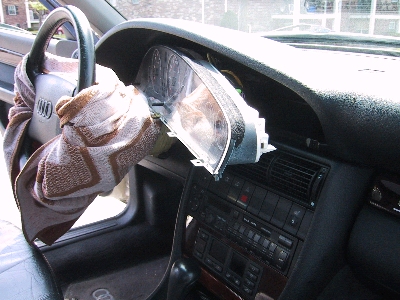
2. You will need to remove the instrument cluster. According to the Bentley manual, the right way to do it is to take off the steering column. The big drawback with this is that you will need to disconnect the airbag, which is dangerous, and it also requires you to disconnect the battery, so you'll need to know your radio code. I did not have my radio code, so I decided to take off the instrument cluster without removing the steering column. It is harder (there is not much space) but definitely possible. When you remove the instrument cluster, be careful not to scratch it or people might think it has been tampered with.
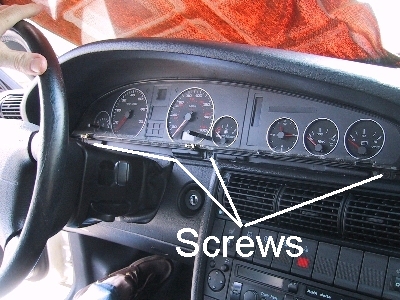
3. First, adjust the steering column so that it is all the way out and all the way up. Then locate and remove two screws under the trim piece at the base of the instrument cluster. Remove the trim piece (start from the door side and move toward the center of the car).
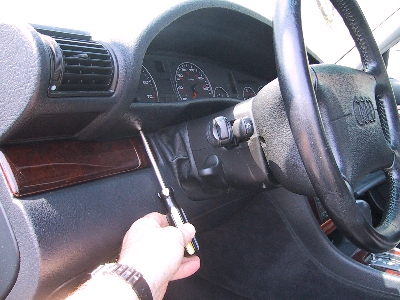
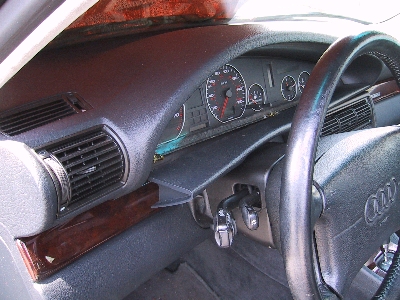
4. Adjust the steering column as low as it goes. Then locate and remove three screws that secure the bottom of the instrument cluster. Now you can pull out the instrument cluster, bottom first.
5. I decided to remove the instrument panel from the car so I disconnected the 5 major cable connectors and a couple of smaller ones. By rotating the right side of the panel toward the steering wheel, I was able to wiggle it upside down to get to the connectors.
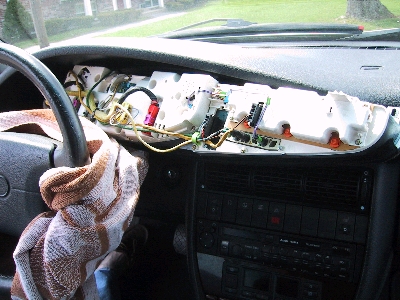
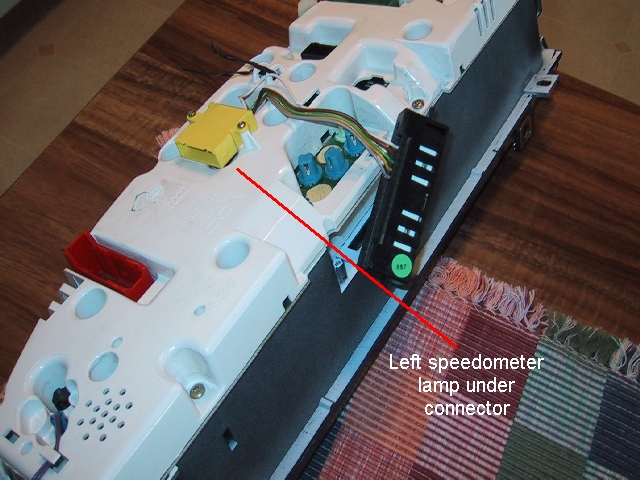
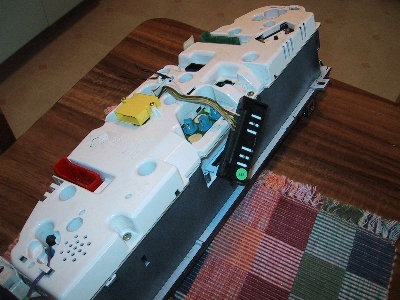
6. With the panel on the workbench, you can see all of the instrument lamps. These are easily replaced.
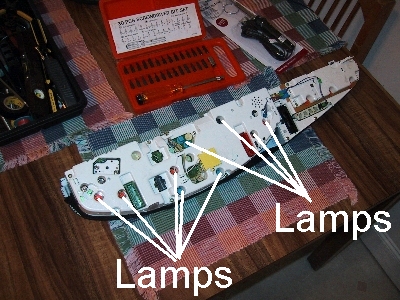
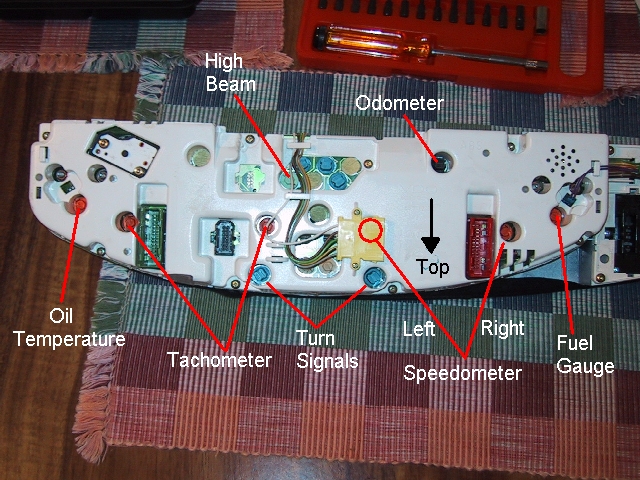
There are 3 lamp types that can be replaced easily from the back of the panel. Use needlenose pliers to turn the lamp one quarter turn counterclockwise to remove.
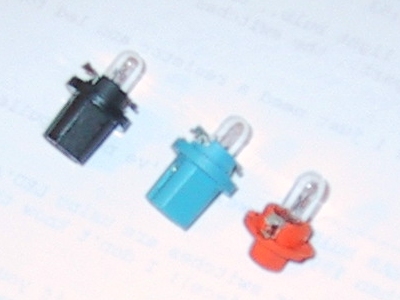
The black base lamp on the left is the replacement NAPA PN 17035. The blue base is the Audi part (it says OSRAM on it, 12V/1.2W). The orange base is another Audi part (OSRAM, 12V/1.1W) with a smaller base. Not shown is an Audi part with a green base (OSRAM 12V/2.0W). Since it is higher wattage, I think it's the high beam indicator.
7. Next, locate and remove the temperature indicator. It is a black box about 8cm long, with a yellow 5-wire connector on it. There's 2 screws holding it in.
8. I did not fix the shift position indicator because it was working just fine. It is a black box about 5cm long with a black connector in case you decide to tackle it. There are two screws, one on each side of the box, that hold it in.
9. Disassemble the temperature display by removing the two screws on the back of the assembly. The temperature display indicator has electric tape around it -- don't forget to put that back when you reassemble it!
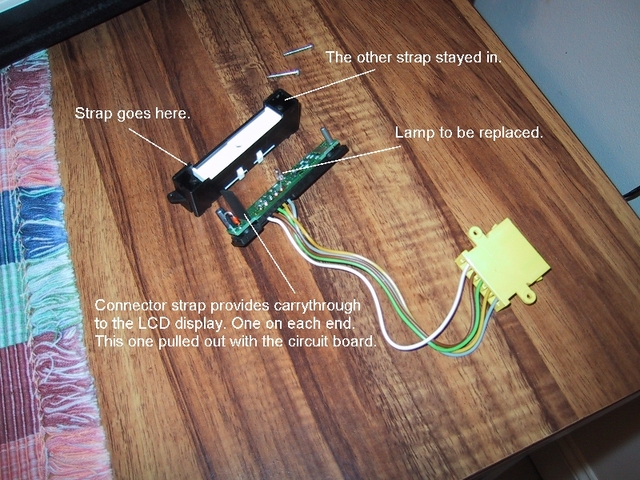
Be careful when this comes apart. There are 2 black connector straps that provide the connection to the LCD display. Note in this picture that the left strap came out with the circuit board. It's not glued on or anything. It just makes the connection by pressure. If it comes out, put the strap back into the slot in the plastic bezel.
10. Carefully de-solder the old bulb. Use a de-soldering pump if you have one, or a wick if you don't. Test your new bulb with a multimeter before installing, just in case. Make sure it's zero ohms across the leads. Attach the new bulb in the same orientation as the old one. The Radio Shack part fits just fine. I measured the tip of the lamp height as 8mm from the lamp side of the circuit board. I don't think the height is critical but it should be close.
Installing the new lamp takes a while. It was difficult to get the solder out of the holes. I ended up heating the holes and shoving the new lamp leads into the holes one at a time. Then alternately heating and pushing until the lamp was in the right position.
11. Put the panel back in the car and attach the wires to the connectors on the cluster, start the car, and check to see if the new bulbs work. Insert the instrument cluster into the dash and secure it with the three screws. Attach the lower trim strip. It has a metal pin on one side -- insert the pin into place first.
12. Adjust the steering wheel to your preferred position. Start the car and check that the speedometer, odometer, tachometer, lights, gauges, wipers, and turn signals all operate properly. It's possible that something got knocked loose when you were moving the instrument cluster.
This story is by Bob McComiskie. It worked for me. Your mileage may vary. Procedure paraphrased from Viktor Borisov's procedure on 12V.org.